Learn how to install solar panels on a tile roof with this step-by-step guide. Covers waterproofing, bracket selection, safety tips, and maintenance—everything you need to build a leak-free system that lasts 25+ years.
How to Installing solar panels on a tile roof is completely different from installing them on a standard metal roof or asphalt shingle roof. Tiles are inherently brittle and can crack easily if stepped on—let alone when drilling holes, securing mounting brackets, or running wiring. If not handled properly, you could end up with a leaky roof, tiles shattering in large patches, and customers calling in complaints every day. So today, we’re going to walk through the entire process of installing solar panels on a tile roof from start to finish—all practical, hands-on advice.

1. Installation Process: From Start to Grid Connection
Step 1: Preliminary Inspection and Design Planning
Before installation, you must first go up on the roof to take a look. Don’t just climb up, take a quick glance, and come back down—you need to inspect it thoroughly. Carefully assess the material and condition of the tiles—are they clay, cement, or slate? Are there any cracks, crumbling, or loose tiles? If there are issues, replace the tiles before installation; don’t wait until the mounting brackets are in place to discover there’s a gap underneath.
Next, evaluate whether the roof structure can support the load. A complete photovoltaic system—including panels, mounting brackets, cables, and accessories—adds at least 20 to 30 kilograms of load per square meter. And that doesn’t even account for strong winds and snow accumulation. If the roof itself is already deteriorated or was not designed to handle sufficient loads, you’ll need to reinforce it first; otherwise, installing the system will create a safety hazard.
Finally, plan the layout. Use solar radiation analysis tools to identify the areas of the roof with the most sunlight, avoid obstacles such as chimneys, ventilation ducts, and skylights, and determine the orientation and tilt angle of the panels. A due-south orientation is always the most efficient in the Northern Hemisphere, and the tilt angle is generally kept between 30° and 45°, depending on your latitude.
Step 2: Mounting the Racks and Waterproofing
This is the most technically challenging step in the entire process of installing solar panels on a tiled roof, and it’s also where problems are most likely to occur. Currently, there are two mainstream methods: the tile replacement method—removing the tiles at the installation site and replacing them with specialized metal tiles that come with hooks and waterproof bases; and the penetration mounting method—drilling holes through the tiles and securing the mounting base directly into the roof’s wooden rafters.
Personally, I recommend the penetration method, as it provides strong anchoring and excellent wind resistance. However, this requires meticulous attention to waterproofing. At each hole, secure the mounting base with a stainless steel bolt, apply weather-resistant sealant around the bolt, fit an EPDM rubber waterproof gasket, and finally install a metal water-diverting strip over the base. Only with these three layers of protection in place can you ensure that no leaks occur after installing solar panels on a tile roof.
Once the mounting bases are secured, replace the tiles or fill the cut-out areas with sealant, then install the horizontal rails. Each rail must be individually leveled with a spirit level to ensure they are all on the same plane. If the rails are not level, the panels will become warped when installed; over time, excessive internal stress can lead to hidden cracks.
Step 3: Module Installation and Electrical Connections
Lift the solar panels onto the roof and secure them to the rails using edge clamps and center clamps. Leave a gap of 1 to 2 centimeters between panels to accommodate thermal expansion and contraction and allow for air circulation. Then, connect the panels in series using MC4 waterproof connectors. When routing the cables, protect them with UV-resistant conduit to prevent aging from sun exposure.
Electrical connections must be made in accordance with standards. Connect the DC side first, followed by the AC side. Cover the panels with a light-blocking cloth before wiring to prevent high-voltage DC arcing caused by sunlight. All connectors must be tightened securely; excessive contact resistance can generate heat, which in severe cases may burn out the connectors or even cause a fire.
Step 4: System Testing and Acceptance
Once the entire installation is complete, conduct a comprehensive inspection. Tighten all bolts to the torque values specified by the manufacturer—typically 25 to 30 N·m. Ensure all cables are securely fastened with no looseness or wear. Verify that all waterproofing points are properly sealed with no gaps. Then, close the circuit breaker to energize the system and test the operating voltage and current panel by panel to confirm normal system operation. Finally, clean up the site and remove all broken tile fragments and packaging waste.
2. Construction Safety: These Are the Minimum Requirements
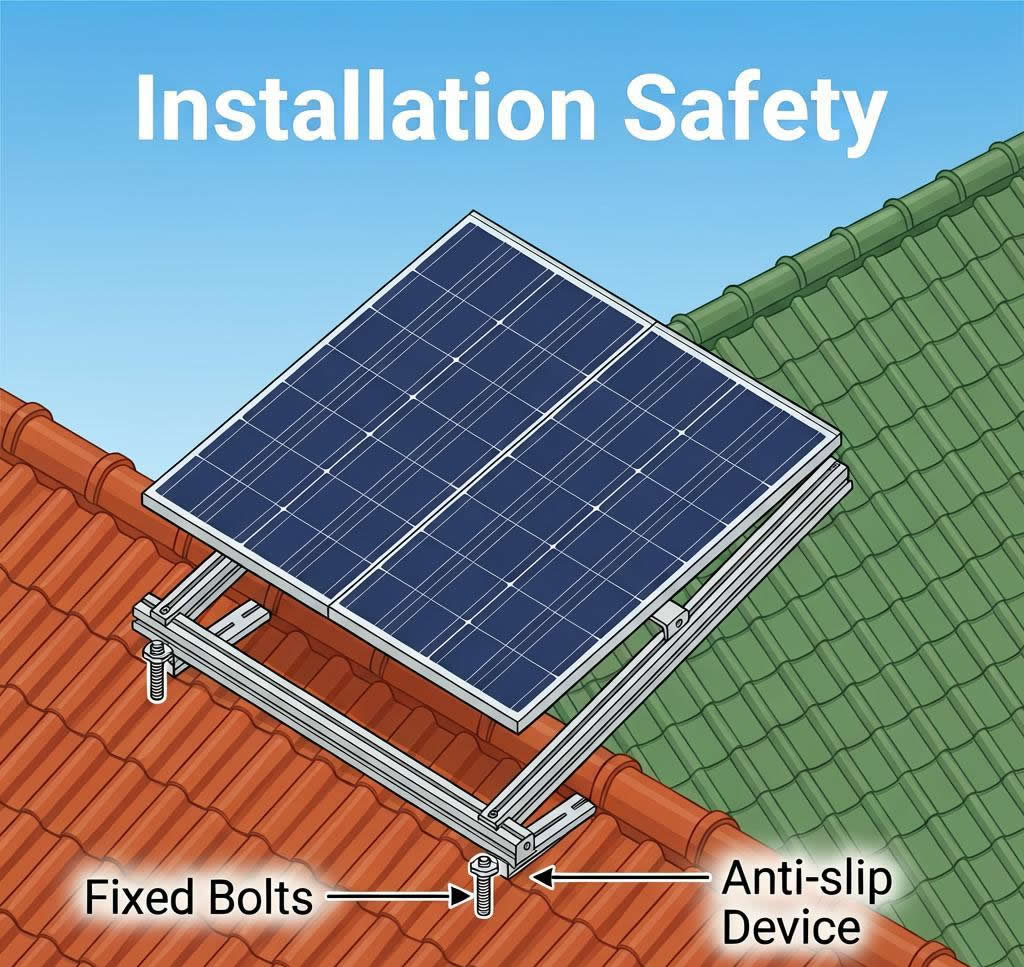
Roof work is a high-risk activity; safety measures must not be compromised in any way.
Fall protection equipment must be worn at all times. A full-body harness, safety rope, and fall arrest device are all essential. The safety rope must be secured to a sturdy structural member at the highest point of the roof; never attach it to a gutter or vent pipe, as these cannot support your body weight.
Stop work in bad weather. Do not go onto the roof under any circumstances when it is raining, snowing, or windy, or when there is frost on the tile surfaces. Wet tiles are even slipperier than ice; a fall could result in broken bones or even more serious injuries.
Exercise caution with electrical work. Before connecting DC circuits, verify that the inverter is turned off. Use insulated tools and wear insulated gloves when wiring. As long as the panels are exposed to sunlight, their output terminals carry high-voltage DC; never touch exposed connections with your bare hands.
Work must be performed by at least two people working together. There should be at least two people on the roof—one working and one supervising. Someone on the ground should also be available to hand up materials and monitor the overall situation. Working alone is a major no-no in this industry; if something goes wrong, there won’t be anyone there to help.
3. How to Choose the Right Mounting System for You
A mounting system isn’t necessarily better just because it’s more expensive, nor is it better simply because it’s cheaper—it must suit your specific circumstances. There are three main factors to consider.
First, consider the type of roof tile. Clay and slate tiles are relatively brittle and prone to cracking when drilled; we recommend using tile-replacement mounting systems or pre-embedded hooks. Concrete tiles are harder and can be drilled through directly, but you must use a specialized drill bit and proceed slowly—do not force the drill.
Second, consider local climate conditions. In coastal or windy areas, choose a mounting system made of stainless steel with deep anchoring to ensure strong corrosion resistance and wind resistance. In typical inland areas, galvanized steel mounting systems are sufficient—they’re low-cost and offer good value for money.
Third, consider the roof’s orientation and structure. For south-facing roofs, fixed-tilt mounting systems offer quick installation and low costs. For east- or west-facing roofs, or those with less-than-ideal slopes, adjustable-tilt mounting systems are needed to position the panels at the optimal angle—sacrificing some installation efficiency in exchange for higher power generation.
4. Ongoing Maintenance: Installation Is Not the End of the Story
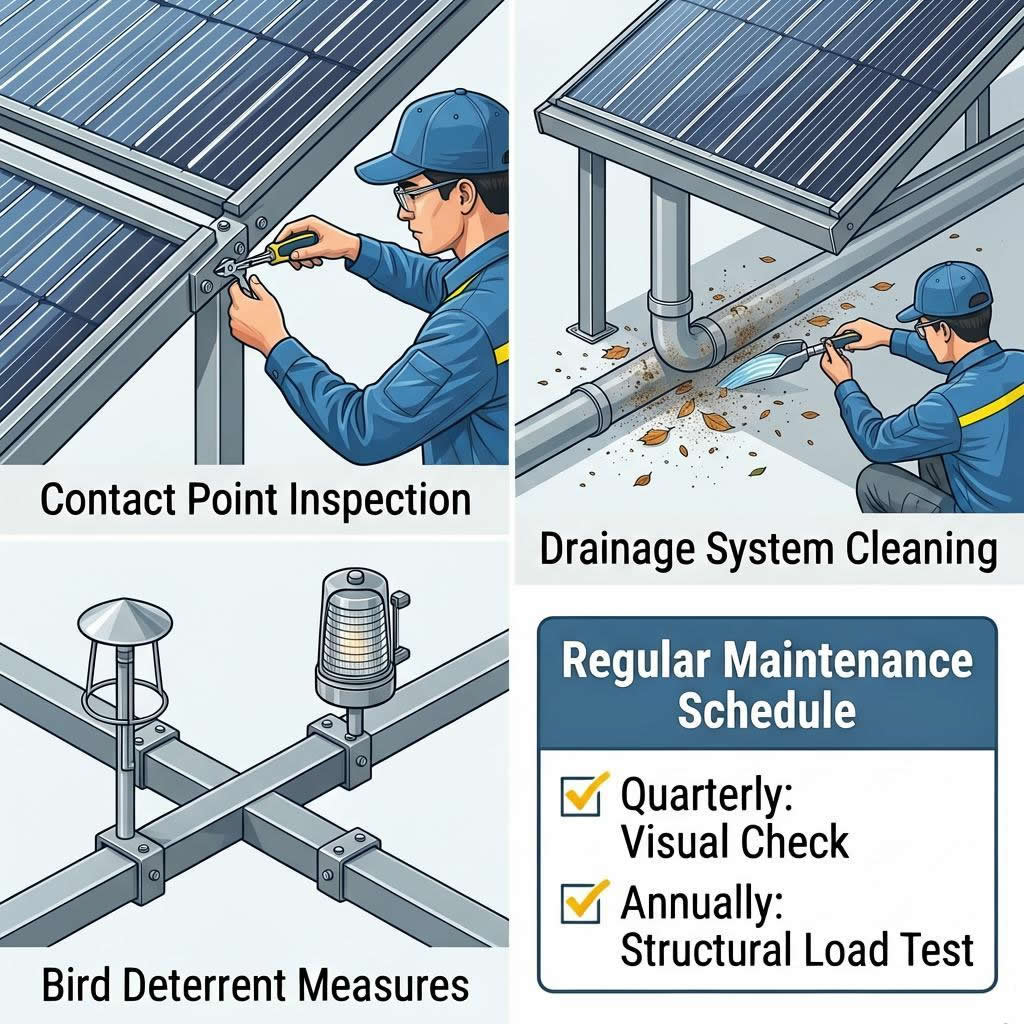
Many installers wash their hands of the project once the system is up and running, but this is not the right approach. A comprehensive inspection should be conducted at least once a year.
Check for loose bolts, especially after typhoons or high winds. Inspect cables for signs of aging, damage, or animal bites. Check the waterproof sealant for cracks or peeling. If your area has high levels of dust or bird droppings, you should also clean the panel surfaces regularly. Excessive dust buildup can reduce power generation efficiency by 10% to 20%, and this loss is ongoing.
When cleaning, simply wipe the panels with clean water and a soft cloth. Do not use a high-pressure water jet, and avoid acidic or alkaline cleaners. It’s best to clean in the morning or evening, avoiding the high-temperature midday hours to prevent hidden cracks caused by sudden temperature changes.
5. How to Find a Reliable Solar Mounting Supplier
Choosing the right mounting system supplier is half the battle won. How can you determine if a supplier is reliable?
First, check if they’ve completed similar projects. Ask them directly for photos of past projects and client contact information, then call those clients to inquire about their actual experience with the products.
Second, verify that their products have official test reports and certifications. Material reports, salt spray test reports, and wind resistance test reports are the bare minimum; if they can’t provide these, rule them out immediately.
Third, evaluate their technical support capabilities. A good supplier doesn’t just sell products; they’ll help you design solutions, provide installation drawings, and offer on-site technical guidance. If they only sell products without providing services, you won’t even know who to turn to if problems arise.
Fourth, consider their delivery lead times and after-sales response speed. Unexpected situations often arise during tile roof installations, requiring last-minute restocking or replacement of parts. If the supplier is slow to respond, your project timeline will be delayed.
6. Summary
Installing solar panels on a tile roof ultimately comes down to three key points: ensuring waterproofing is absolutely leak-proof, securing the mounting brackets as solid as a rock, and implementing safety measures with meticulous attention to detail. If you get these three right, your system will operate reliably for over 25 years. If not, leaks, cracked tiles, loose panels, or safety hazards—any one of these can ruin your reputation.
7. Frequently Asked Questions
Q1: Will the roof leak after the solar panels are installed?
Not if the waterproofing is done properly. We use a three-layer protection system consisting of sealant, rubber gaskets, and metal water-diverting strips; under normal use, leaks will not occur. However, if corners are cut during installation, leaks are inevitable.
Q2: Can solar panels be installed on any tile roof?
Not necessarily. It depends on the condition of the tiles and the load-bearing capacity of the roof structure. If the tiles are extensively weathered or the roof trusses are warped, repairs and reinforcement must be carried out before installation; otherwise, there are safety hazards.
Q3: How long do mounting systems typically last?
Stainless steel and aluminum alloy mounting systems are designed to last over 25 years, matching the lifespan of the solar panels. Galvanized steel mounting systems have a shorter lifespan, typically 15 to 20 years, depending on the thickness of the galvanized coating and the operating environment.
Q4: How long does it take to install a system?
For a typical residential roof, 3 to 4 skilled workers can usually complete the entire installation and commissioning in 2 to 3 days. If the roof structure is complex or the area is large, the time required will increase accordingly.
Q5: Are the ongoing maintenance costs high?
No, they aren’t. An annual inspection plus occasional panel cleaning incur very low costs. The biggest cost is simply remembering to schedule these inspections on time.
8. Choose Yiteng Solar
Leave the experts to handle the experts’ work.
Yiteng Solar provides a complete range of tile-roof mounting solutions, covering various tile types and climatic conditions, with top-quality products and comprehensive technical support. Whether you’re an installer or a homeowner, we can tailor the solution that best suits your needs.


